I. Introduction
A. The Rise of Resin Jewelry:
In recent years, resin jewelry has become a popular crafting choice due to its unique ability to combine stunning aesthetics with endless customization possibilities. Unlike traditional jewelry made from metals or gemstones, resin allows crafters to capture personal touches and create one-of-a-kind pieces that reflect their individual style.
B. The Allure of Resin Jewelry:
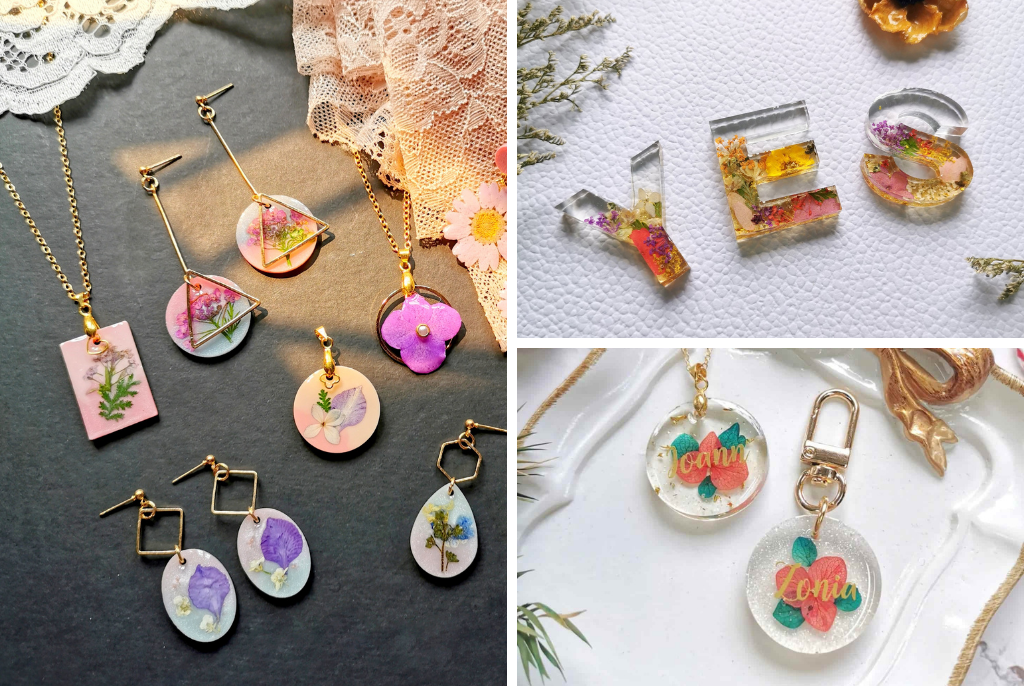
The appeal of resin jewelry is multifaceted. Firstly, customization reigns supreme. Resin can be combined with a vast array of colors, glitters, pigments, and natural elements like dried flowers and shells, allowing crafters to express their creativity and design truly unique pieces. Secondly, resin is a budget-friendly material, making it an accessible hobby for beginners and seasoned artists alike. Finally, the finished product boasts a beautiful, glossy finish that adds a touch of elegance and sophistication to any outfit.

II. Essential Supplies for Resin Jewelry Making
A. Choosing the Right Resin:
There are two main types of resin commonly used in jewelry making: epoxy and polyester. Epoxy resin is known for its crystal-clear clarity and superior durability, making it ideal for preserving the beauty of embedded elements. Polyester resin, on the other hand, is a more affordable option, but it may have a slightly yellow tint and is not as scratch-resistant. A third option gaining popularity is UV resin, which cures quickly under a UV lamp, perfect for small and quick projects.
B. Molding Your Designs:
Silicone molds are the most popular choice for resin jewelry making due to their flexibility and ease of demolding. They come in a wide variety of shapes and sizes, from geometric pendants to intricate animal figurines. Bezels offer pre-made metal settings for pendants and rings, providing a structured base for your resin creations. Open bezels grant more design freedom, allowing you to directly pour resin onto a flat surface and incorporate embellishments. To prevent the resin from sticking to the mold, a mold release agent like silicone spray is recommended.
C. Mixing Essentials: Invest in disposable cups for mixing resin to avoid contaminating future batches. Stirring sticks and silicone spatulas are your best friends for thorough mixing without introducing air bubbles, which can cloud your finished piece.
D. Safety First: Resin can irritate skin and release fumes, so prioritize safety. Wear gloves and safety glasses whenever handling resin. It’s crucial to work in a well-ventilated area with open windows or a fan. For those working with large quantities of resin or experiencing strong fumes, consider wearing a respirator for added protection.
E. Embellishment Extravaganza: Unleash your creativity with a variety of embellishments! Dried flowers, glitter, and pigments add vibrant pops of color and texture. Beads and charms in all shapes and sizes can be incorporated to create personalized touches. Don’t be afraid to experiment and find unique elements that speak to your style.

III. Setting Up Your Workspace
A. A Dedicated Crafting Haven: Choose a well-ventilated area as your designated workspace. This will help ensure proper air circulation and minimize exposure to resin fumes.
B. Protecting Your Surface: Cover your work surface with a drop cloth, plastic sheet, or newspaper. This will prevent spills and make cleanup a breeze.
C. Lighting Up Your Creativity: Ensure good lighting in your workspace. This will allow you to see details clearly while working with resin and mixing colors accurately.

IV. Safety Precautions
A. Understanding the Risks: Resin can cause skin irritation, allergic reactions, and release fumes. Skin contact with uncured resin can lead to redness, itching, or burning. Inhaling fumes can cause respiratory irritation, so proper ventilation is vital.
B. Safeguarding Yourself: Always wear nitrile gloves and safety glasses when handling resin to protect your skin and eyes. Work in a well-ventilated area with open windows or a fan running. If working with large quantities of resin or experiencing strong fumes, consider using a respirator for an extra layer of protection.
C. Responsible Disposal: Dispose of used gloves, mixing cups, stir sticks, and paper towels responsibly. Check with your local regulations for proper disposal of uncured resin and leftover materials. Never pour resin down the drain or dispose of it with regular household waste.
V. Preparing Your Molds and Embellishments
A. Mold Prep for Perfect Results: Clean and dry your molds thoroughly with a lint-free cloth to remove any dust or debris. This ensures a smooth surface for your cast resin and prevents imperfections.
B. Embellishment Bonanza: If using dried flowers, ensure they are completely dry and brittle to avoid trapping moisture within the resin. Arrange beads and charms carefully within the mold using tweezers or a toothpick to achieve your desired design.
C. Placement is Key: Once you’ve chosen your embellishments, strategically place them within the mold according to your design plan. For a dimensional effect, layer elements on top of each other, or position them within the mold cavity for full encapsulation.
VI. Mixing Resin
A. Reading the Recipe: Every resin brand has its own specific mixing ratio. Carefully read the manufacturer’s instructions before starting. Typically, you’ll need to mix equal parts of resin and hardener.
B. Mixing Meticulously: Measure your resin and hardener accurately using measuring cups marked in milliliters (ml) for the best results. Pour the measured parts into your designated disposable cup. Mix slowly and thoroughly for several minutes, scraping the sides and bottom of the cup to incorporate all the resin. This minimizes air bubbles, which can detract from the clarity of your finished piece.
C. Avoiding Contamination: Use a separate disposable cup and stir stick for each batch of resin you mix. This prevents cross-contamination and ensures a clean mixing process.
VII. Pouring and Curing Resin
A. Slow and Steady Wins the Race: Slowly pour the mixed resin into the mold, taking your time to avoid creating air bubbles. A slow and steady stream helps prevent trapped air that can cause imperfections in your cured resin.
B. Bubble Banishing Techniques: If air bubbles do appear, use a toothpick or a heat gun (held at a safe distance) to gently pop them. The heat will cause the bubbles to rise to the surface and burst.
C. Patience is a Virtue: Allow the resin to cure completely according to the manufacturer’s recommended time, which is typically 24-48 hours at room temperature. Avoid moving or disturbing the mold while the resin cures, as this can disrupt the curing process and lead to a flawed final product.

VIII. Demolding and Finishing
A. Gentle Release: Once fully cured, carefully remove the resin piece from the mold. Gently twist and flex the mold to ease the resin out. If the resin seems stuck, you can try running warm (not hot) water over the mold to loosen its grip.
B. Trimming the Excess: After demolding, there may be some excess resin around the edges of your piece. Use a sharp razor blade or sandpaper to carefully trim away any imperfections or uneven edges.
C. Buffing to Perfection: For a flawless finish, lightly buff the surface of your resin creation with a soft cloth or polishing compound. This removes any minor scratches or surface irregularities, leaving your resin jewelry with a beautiful, glossy shine.