Friendship bracelets, those colorful, woven bands of string or embroidery floss, have been a symbol of friendship and personal expression for decades. Whether you’re a seasoned crafter or a curious beginner, making friendship bracelets with beads is a fun and rewarding activity that allows you to unleash your creativity and create unique, personalized pieces. In this comprehensive guide, we’ll walk you through the step-by-step process of crafting your own beaded friendship bracelets, from gathering materials to adding finishing touches.
Introduction: Embracing the Art of Friendship Bracelets
Welcome to the world of friendship bracelets, where creativity and personal expression intertwine to create meaningful keepsakes. These timeless accessories, often adorned with colorful beads, have long been a symbol of friendship, representing the special bonds we share with our loved ones. Whether you’re crafting them for yourself, your best friends, or as thoughtful gifts, friendship bracelets offer a delightful way to express your unique style and celebrate the connections you cherish.
Gathering Materials: Setting the Stage for Your Creative Journey
Before embarking on your friendship bracelet adventure, it’s essential to assemble the necessary materials. These simple yet essential tools will transform your imagination into tangible creations.
-
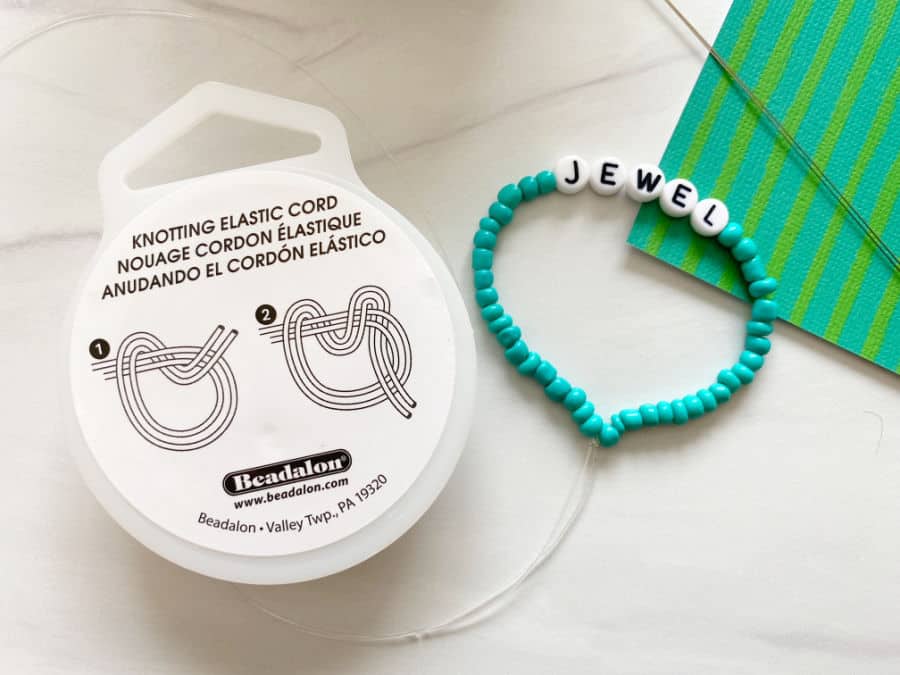
Beads: The star of the show, beads come in a dazzling array of colors, shapes, and sizes. Whether you prefer delicate seed beads, chunky pony beads, or alphabet beads with personalized messages, let your creativity guide your selection.
-
Embroidery Floss: The foundation of your bracelet, embroidery floss provides strength and durability while adding a touch of vibrant color. Choose a variety of hues to match your bead choices and create eye-catching designs.
-
Scissors: These trusty tools will help you cut the embroidery floss to the desired length and trim any loose ends for a polished finish.
-
Clasp (Optional): If you prefer a secure closure, a clasp can be added to your bracelet for easy on-and-off wear.
Choose Your Design: Unleashing Your Inner Artist
With a plethora of patterns and designs available, the possibilities for friendship bracelets are endless. Let your imagination run wild as you explore various options to create bracelets that reflect your unique style and personality.
-
Basic Patterns: Start with simple patterns like the candy stripe or chevron to get a feel for the weaving technique. These classic designs are perfect for beginners and offer a great foundation for more intricate creations.
-
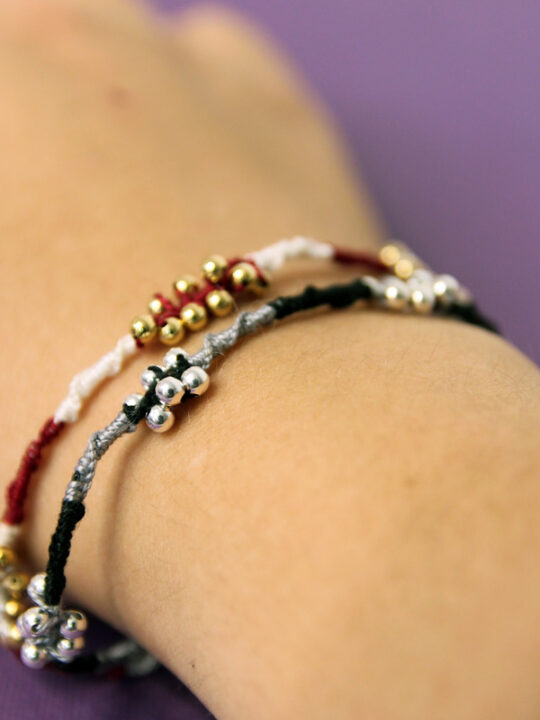
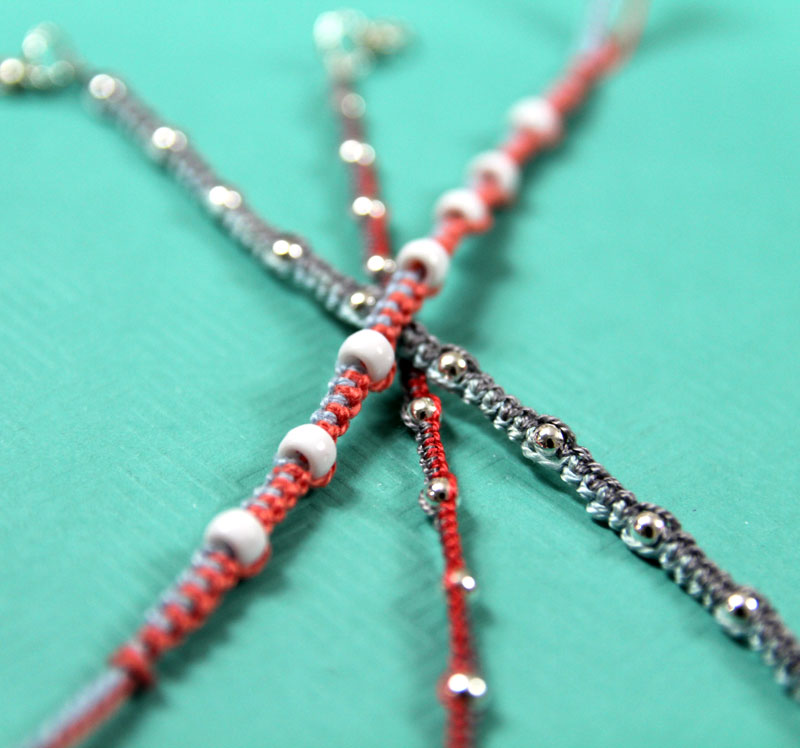
Advanced Patterns: As your skills grow, venture into more advanced patterns like hearts, diamonds, or intricate geometric designs. These patterns add a touch of sophistication and allow you to showcase your creativity.
-
Personalize Your Designs: Incorporate your initials, favorite colors, or meaningful symbols into your designs to create truly personalized friendship bracelets. Let your creativity tell a story with each bead you choose.
Step 1: Preparing the Beads and String
Once you’ve gathered your materials and chosen your design, it’s time to prepare the beads and string for your friendship bracelet masterpiece.
-
Threading the Beads: Carefully thread the beads onto the embroidery floss, ensuring even spacing and preventing tangles. Use a beading needle or a fine-tipped tool to guide the beads onto the string.
-
Creating Adjustable Loops: At each end of the bracelet, create adjustable loops using the embroidery floss. These loops will allow you to easily adjust the bracelet’s size to fit your wrist or that of your friend.

Step 2: Creating the Basic Friendship Bracelet Pattern
The foundation of many friendship bracelet designs is the basic pattern, also known as the candy stripe pattern. This simple yet versatile pattern is a great starting point for beginners and can be easily adapted into more intricate designs.
- Step-by-Step Instructions:
-
Cross the Strings: Cross the two strings, ensuring the beads remain in the desired order.
-
Create a Knot: Bring the bottom string up and over the top string, creating a knot.
-
Tighten the Knot: Gently pull on both strings to tighten the knot and secure the beads in place.
-
Repeat: Repeat steps 1-3 until you reach the desired length for your bracelet.
Step 3: Adding Variations and Designs
With the basic pattern under your belt, it’s time to explore the vast world of variations and designs. Experiment with different patterns, colors, and bead combinations to create unique and personalized friendship bracelets.
-
Introducing Advanced Patterns: Move on to more advanced patterns like chevrons, diamonds, and hearts. These patterns add a touch of sophistication and allow you to showcase your creativity.
-
Visual Guides and Diagrams: Utilize visual guides and diagrams to illustrate the weaving techniques for different patterns and designs. These visual aids can make learning new patterns a breeze.
-
Experimenting with Colors and Beads: Play with different colors and bead combinations to create eye-catching and personalized bracelets. Let Your creativity guide your color choices, whether you prefer bold and vibrant combinations or a more subtle and elegant look.
-

Step 4: Finishing Touches and Closure
The final step involves securing the ends of your bracelet and adding those finishing touches that make it truly special.
-
Securing the Ends: Choose a method to secure the ends of your bracelet. You can tie simple knots, use crimps and beads for added security, or attach a clasp for easy on-and-off wear.
-
Trimming and Tidying Up: Use your scissors to carefully trim the excess embroidery floss close to the knots. This creates a clean and polished look for your finished bracelet.
-
Adding Charms and Personal Touches: Don’t be afraid to personalize your bracelet further! Add charms, pendants, or other embellishments that reflect your personality or the recipient’s interests.
Conclusion: A Celebration of Creativity and Connection
Through the process of creating friendship bracelets with beads, you’ve not only crafted a beautiful and unique accessory, but also embarked on a journey of creative expression and connection.
-
Summary of the Process: Recap the steps involved in making beaded friendship bracelets, from gathering materials and preparing the string to creating the basic pattern and adding finishing touches.
-
Creative Expression and Meaning: Remember, friendship bracelets are more than just colorful bands. They represent the joy of creation, the power of self-expression, and the importance of connection.
-
Sharing and Enjoying Your Creations: Don’t keep your beautiful creations to yourself! Share your finished friendship bracelets with friends, family, or even complete strangers to spread creativity and joy.
Additional Tips and Tricks: Expanding Your Skills
As you delve deeper into the world of friendship bracelets, these additional tips and tricks can enhance your skills and broaden your creative horizons.
-
Using Different Types of Beads: Explore using various types of beads, such as seed beads for intricate patterns, pony beads for a bolder look, or alphabet beads for personalized messages.
-
Creating Multi-Strand Bracelets: Take your creations to the next level by crafting multi-strand friendship bracelets. These add visual interest and allow for even more intricate designs.
-
Troubleshooting and Common Mistakes: Don’t be discouraged by mistakes! Address common issues like knotted threads or uneven tension, and learn valuable troubleshooting techniques.
Further Inspiration and Resources: Fueling Your Creativity
The world of friendship bracelet making is vast and ever-evolving. Here are some resources to keep your creativity flowing:
-
Online Tutorials and Videos: Utilize online tutorials and videos for visual guidance and inspiration. Seeing the techniques demonstrated can make learning new patterns even easier.
-
Friendship Bracelet Books and Patterns: Invest in books and online resources dedicated to friendship bracelets. These resources offer a treasure trove of unique patterns and design ideas.
-
Joining Online Communities: Connect with other friendship bracelet enthusiasts by joining online communities or forums. Share your creations, learn from others, and find endless inspiration.
With dedication, practice, and a sprinkle of creativity, you can become a master of friendship bracelet making. So, grab your beads, unleash your imagination, and embark on a delightful journey of crafting personalized and meaningful keepsakes for yourself and your loved ones.
-